
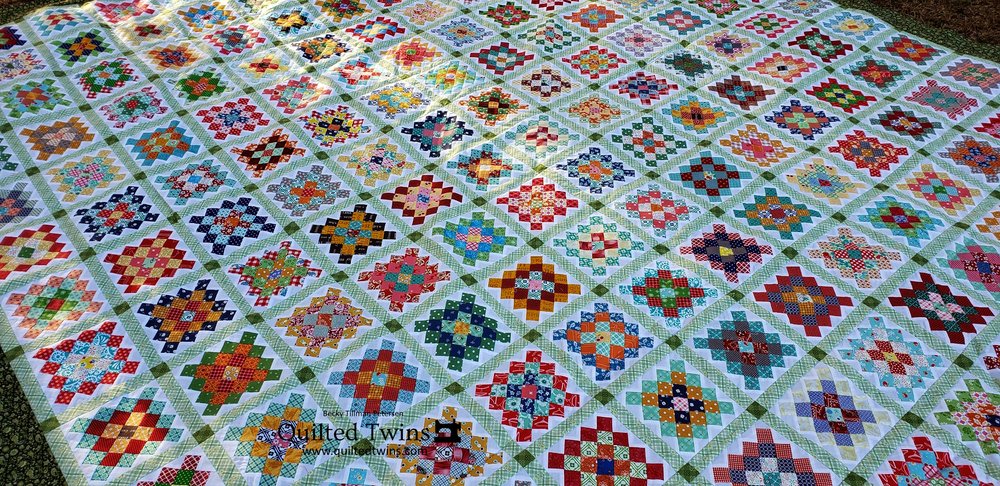
You all know I finished up the 1.5” squares that I made into a very big granny square quilt top. So far I’ve not quilted it yet, though I did get the backing ready so once I get down there and start in on quilting quilts, I’ll not be stopped by the need to make backings.

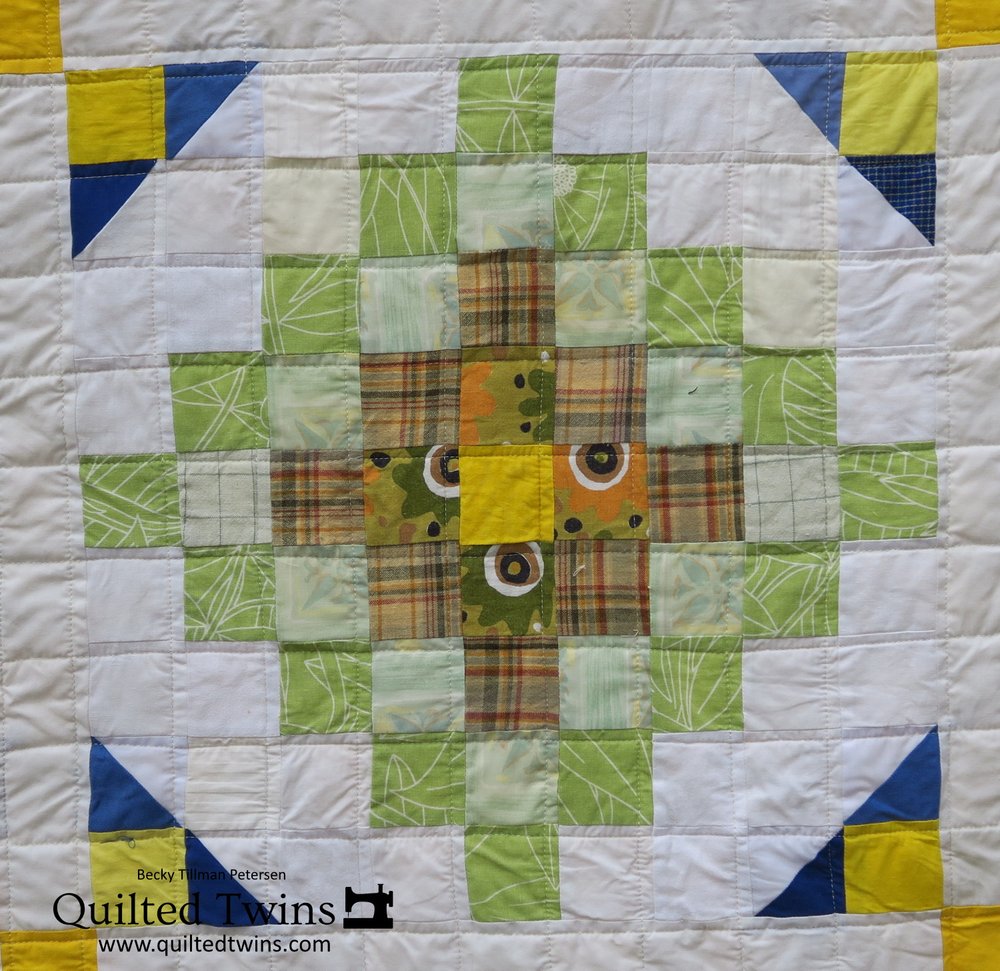
I knew I wanted to make something with the next size up of blocks – meaning 2” squares instead of 1.5”. I have made a quilt with something sort of like this – check out this one.
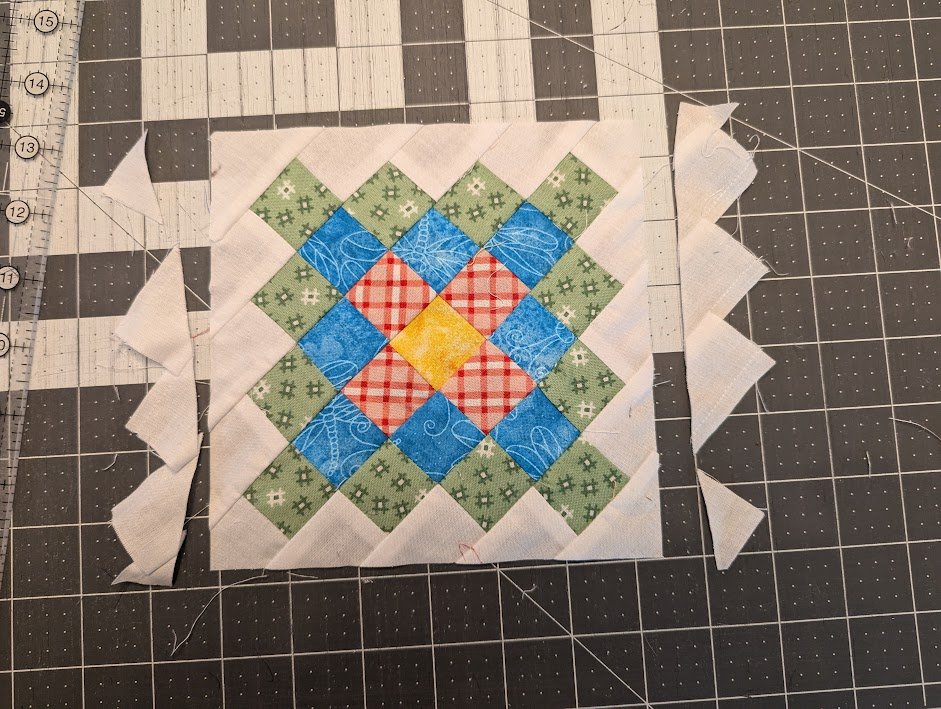
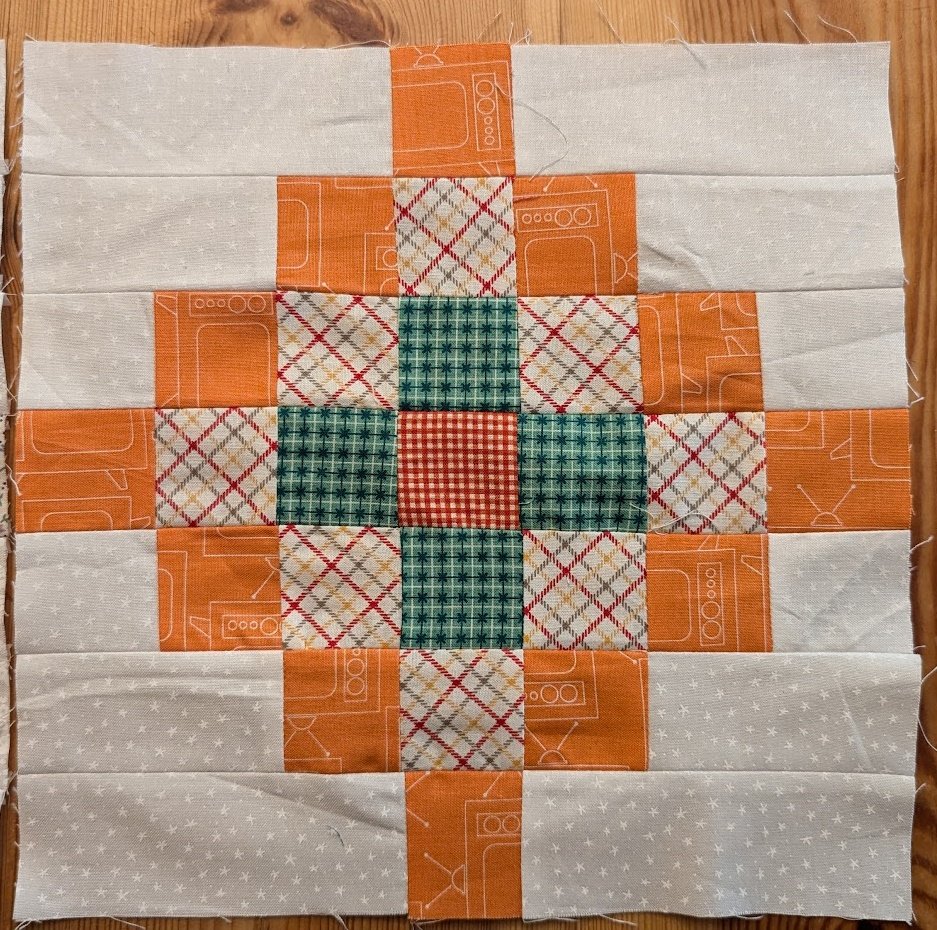
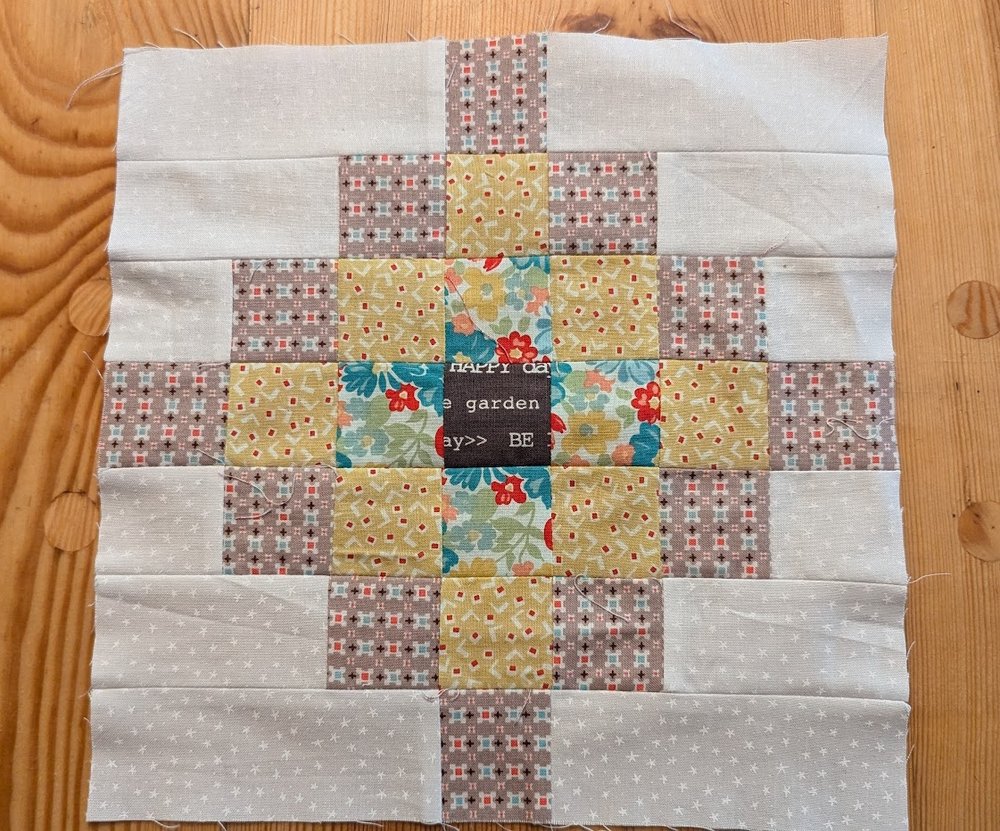
In order to make this top, however, it is not like the regular granny square. Well, it is, but it isn’t. Here is a close up of this block:
In general, a granny square block looks like this:

This one looks like a granny square, but on point. Some call it a version of Around the World.
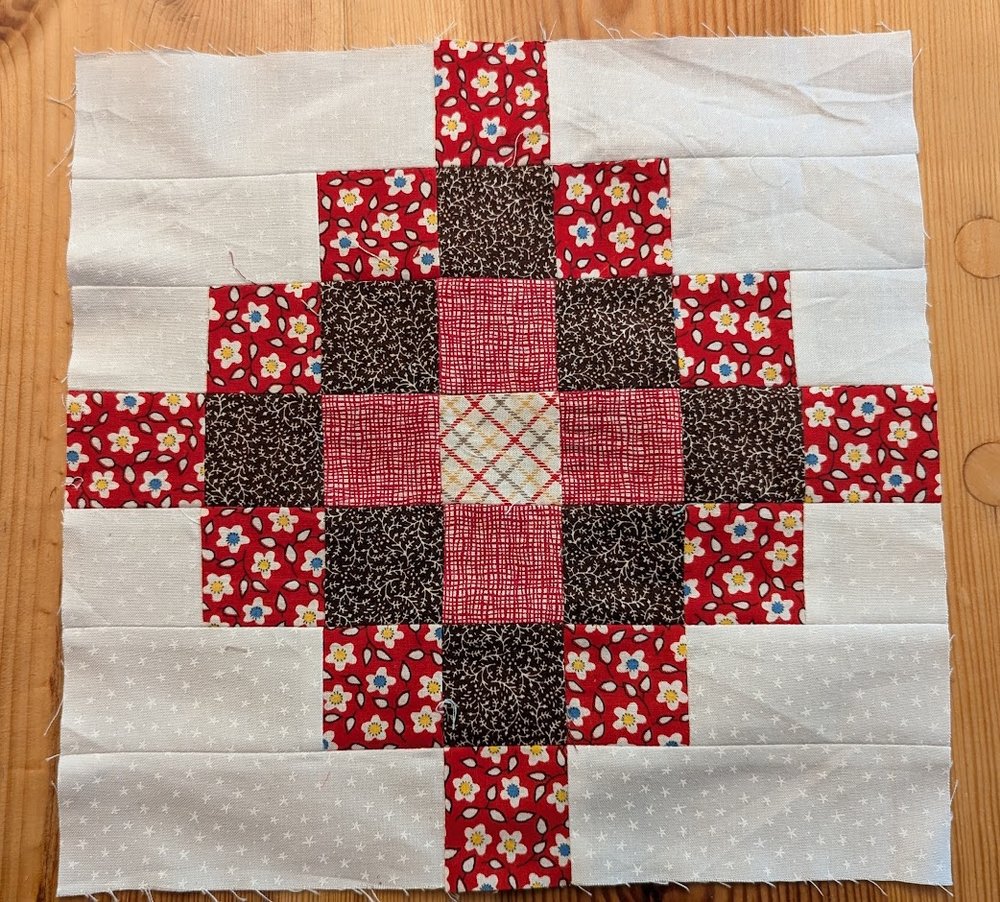
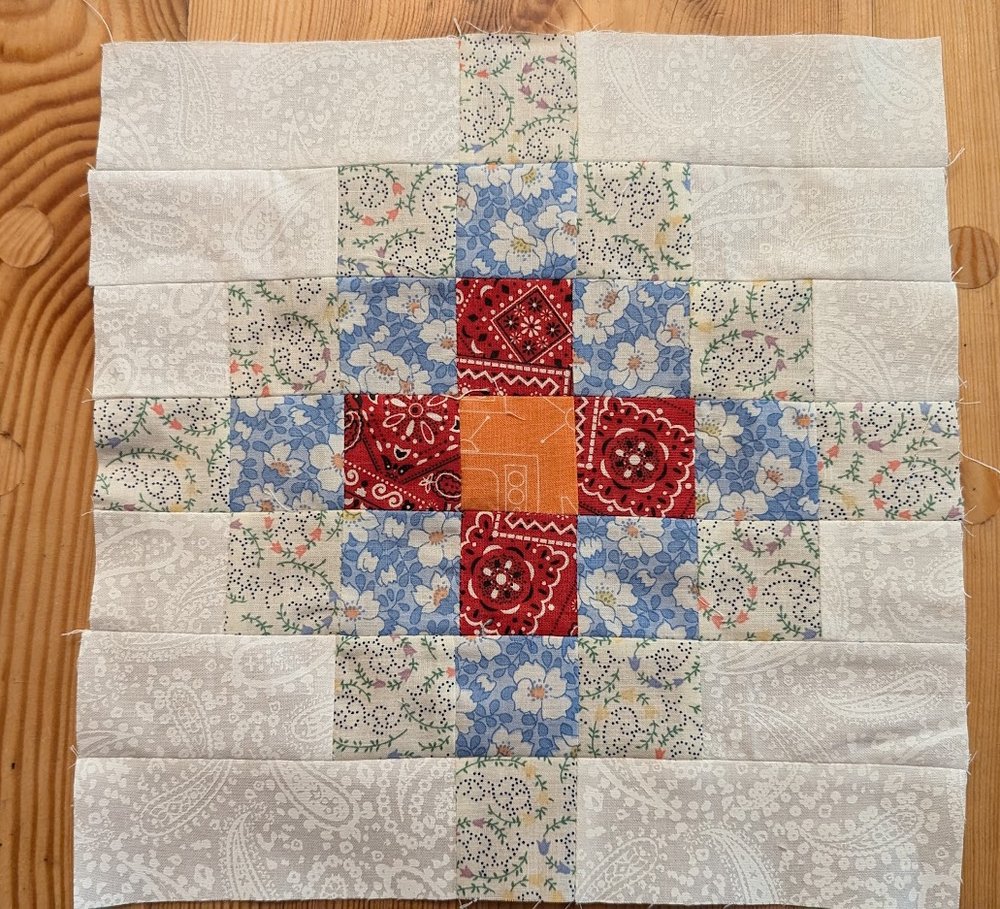
The blocks for this next 2” strips quilt look like this:

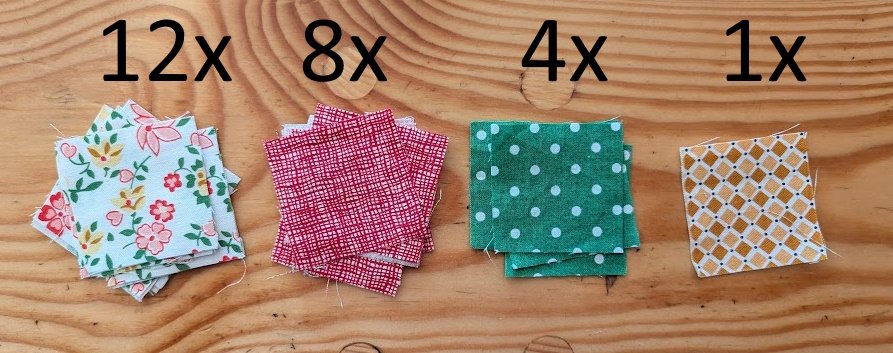
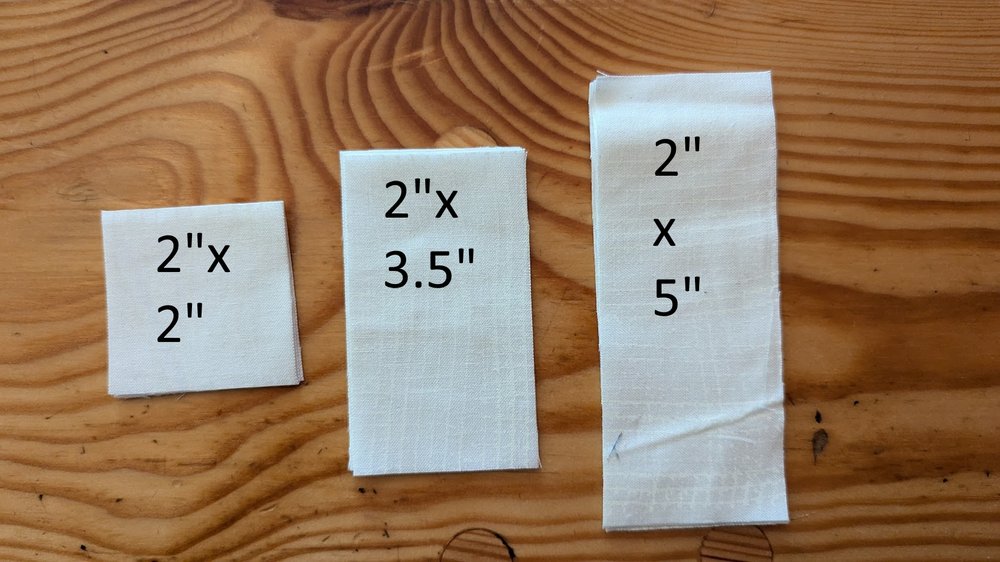
This block is 10.5” finished. Here are the pieces needed for this block:
The colorful ones are 2” squares:
I work with a block like this not with strip piecing, but with squares. I am literally using scraps and small pieces. So far I’ve used 3 different whites. I will be using other white on whites – or solid whites. I’m sure there will be subtle differences in colors of my whites – but I’m not going to care as this is a scrappy quilt. I may go through my 2” strips bags and pull from them for the whites.
These are the blocks I’ve pressed open, however I’ve not trimmed them yet.
Below are all the blocks I’ve made so far. On the left are the blocks that are pressed to one side and the right are the ones that are pressed open. Well, I say that, but I really mean, pressed open in just the final direction. I did nest the seams when making the first direction so I did not press that first set of seams open, but to one side.

The left side of blocks are pressed to one side – the right are pressed open. Eventually I will press the final rows open. They are definitely lying flatter once pressed open.
I will go back and press the blocks open as to the final seams going down the block. When actually making the block, I think I’m far more accurate by nesting the seams than I would by matching the seams unless I pinned each intersection. And that I’m not interested in that.
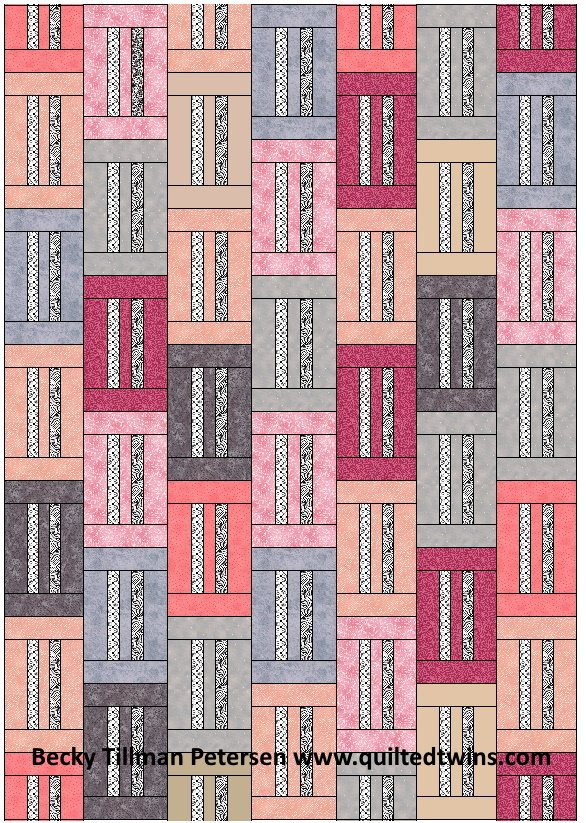
I am going to be making these blocks with happy fabrics – I have lots of these brights – leftover from Lori Holt quilts AND just those colors. It is going to be a half drop block design meaning the blocks will be up and down columns – but going one half of a block alternating. Here’s the layout. I planned a sashing strip underneath/between each block up and down. There is otherwise, no sashing.
Looks like I will have a lot of seams to match when I go to sewing the rows together.

I will be working on this one for a while as I will need quite a few blocks – 64 in fact. I only have a few finished. I find that making these blocks to be great fun – and each one that is made is so refreshing. Making some order out of the random collection of squares is sweet to me.
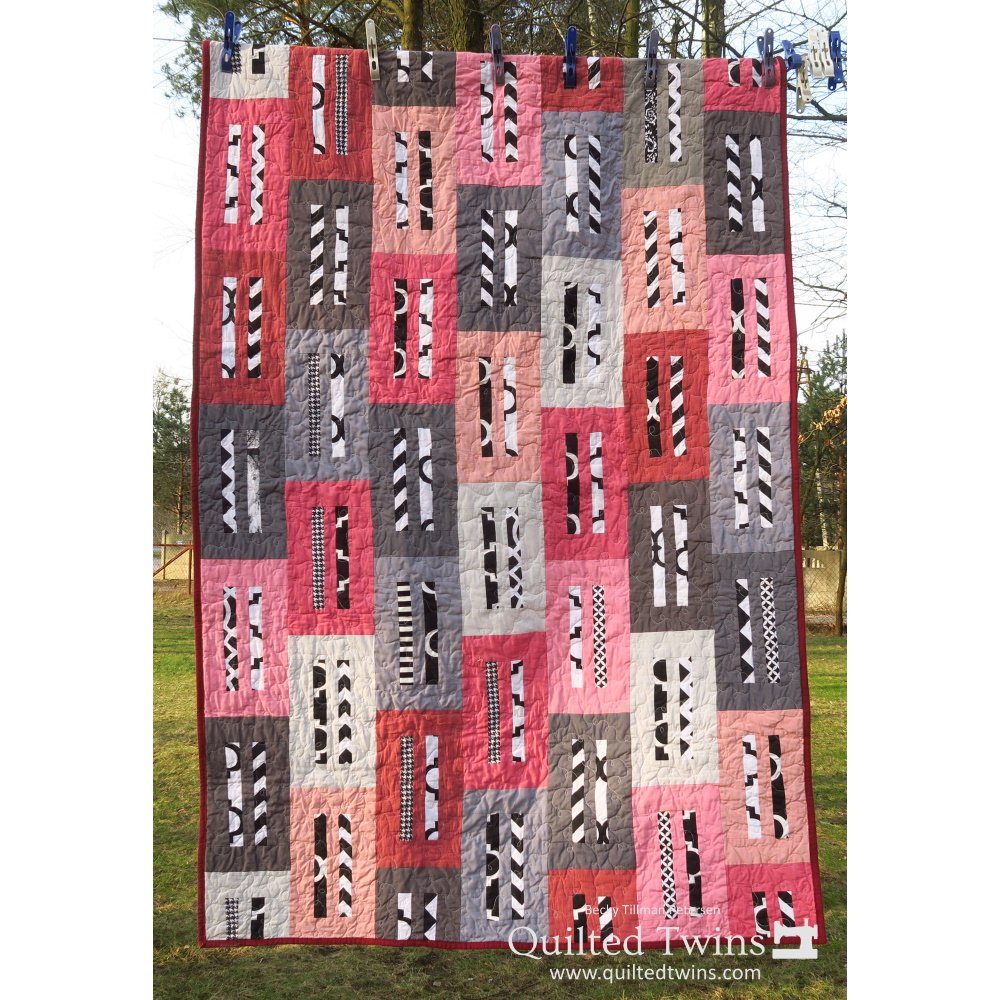
I have made other “half drop block”’ quilts. Here’s one. I am showing the quilt and layout side by side. I have several more planned in my Electric Quilt program. I just have to be in the right mood as I tend to work more with a straight layout or an “on point” layout.
I will share my progress on making these 64 blocks from time to time until I finish the ones needed for this quilt.
Thank you so much for coming along with me on this journey.
Have a great day wherever you are reading this!
Be sure to check out what my sis has for you in the store here!
Feel free to browse the site.